How to Use A Wood Floor Sander Machine
In this article:
Types of Wood Floor Sanding Machines
- The Drum Sander Does Most of The Floor
- The Edger Sands Where the Drum Can’t Reach
- The Random Orbital Sander
How to Operate a Drum Sander
How to Operate the Edger
A Quick Word about Sandpaper
How to Choose the Best Hardwood Floor Sanding Machine
Which Wood Floor Sander Is the Best?
Are you trying to sand an old wood floor down to bare, new wood? It’s not an easy job. Even with the right tools, you need a bit of practice and the proper techniques. Once you’ve done the tough job of removing all the dings, scratches, and old finish from the floor, it will be a breeze to stain and add a new finish.
Something is satisfying about standing back and admiring a freshly finished wood floor.
This article will fill you in on finding, renting, and using the right sanders for your job.
If you plan to rent a wood floor sander machine, rent from a flooring specialty shop instead of a general equipment rental store. They will give you invaluable expert advice at no extra charge and possibly throw in a lesson before you go.
Be sure to measure the room because you’ll need to know the square footage. The information will help the rental store folks estimate how many sanding discs and belts you’ll require.
Types of Wood Floor Sanding Machines
To do a proper sanding job on a wood floor, you’ll need two machines, a drum sander, and an edge sander, or edger, to sand along all baseboards.
The Drum Sander Does Most of The Floor

As the name implies, a drum sander has a rotating drum onto which you attach various grits of sandpaper. The revolving sandpaper removes the old finish and wood.
It’s a heavy machine, from 125 to 175 lbs. for some models and has a strong 1.5 hp motor that spins a 7 or 8-inch wide drum. When it’s running, all that weight presses down on only a few square inches of sandpaper at the bottom of the spinning drum. If you don’t use this machine correctly, it can quickly gouge out the floor or leave chatter marks that look awful when you finish the floor.
To operate this type of hardwood floor sanding machine, you hold the handle and walk behind it to control and guide it. We’ll get into the operation in a moment.
The Edger Sands Where the Drum Can’t Reach
The other tool you’ll need is called an edger. It uses a rotating disc to finish sanding the floor near the baseboards where the drum sander can’t reach. It’s smaller than the drum sander, but don’t underestimate its ability. An edger’s powerful 7-inch diameter spinning abrasive disc will remove an equal amount of material when using the same grit.
It requires a different technique to operate than a drum sander, which we’ll cover next.
The Random Orbital Sander

One more sander that you may see is called a random orbital sander. It looks more like a floor buffer, and that’s what it does. It doesn’t have the power of a drum sander to sand down to bare wood. Here is a video from a DIYer on why a random orbital sander was the wrong tool choice.
A drum and edger are the sanders you need. Let’s talk about how to use them.
How to Operate a Drum Sander
Before you get started sanding, you’re going to need a few accessories:
- Ear protection
- Eye protection
- Face Mask
- A shop vac
- Enough sanding sleeves, in the right grits, to finish the room
- Heavy-duty extension cord
- A container and trash bags to empty the dust bag
Let’s get started.
Set up the Machine
Before working on the machine, be sure that it is unplugged.
- Attach the abrasive sleeve.
- Close the door to the drum.
- Add the dust bag. Always empty it when it’s less than half full.
- Plug in the machine. 20-amp circuits like the ones in kitchens or bathrooms work best.
- Start moving before lowering the drum.
Repeat...Roll the machine at the same time you gently lower the drum with the feathering handle. It must be a gradual, moving transition. It’s like shifting a manual car.
Never stop in one place with the drum lowered.
Regarding sandpaper grits, they get progressively finer. It is necessary to progress through each series of grits to remove the scratches left by the previous grit. A typical sequence is 24-36-60-80 for coarse-grain wood like oak. For fine-grain wood like birch or maple, use 100-grit.
Don’t start with grit that’s too fine. It will clog up and glaze over in just a few minutes.
Begin at The Left Wall
It’s best to begin at the left wall halfway between the front and back wall of the room. Work your way forward. Remember the technique of gently lifting the drum before reaching the wall and gradually lowering it for the return pass. Always keep the sanding machine in motion while the sanding drum is touching the floor surface, or it will gouge out stop marks.
Keep your pace steady, and sand parallel to the boards, never diagonally or across. Stagger the stopping points for a better blend when edging.
Change the Dust Bag and Belts Often
Always stay safe by switching off the power and disconnecting the sander before working on it. It’s essential to empty the dust bag when it’s 1/3 full. The dust from floor sanding can spontaneously combust. Empty the dust into a plastic bag, remove excess air, seal it tightly and store outside away from the building as a precaution. NEVER throw away rags that have paint, stain, or solvent in the same bag as the dust. It’s a fire hazard.
For an in-depth video on how to operate a drum sander and an edger, go here.
How to Operate the Edger
Remember to buy enough sanding discs, in the same grits as the drum sander, to cover the entire area. For best results, follow up each phase of drum sanding with edging using the same grit.
Set Up the Edger
Use the same grit disc as you used on the drum sander.
- Turn the machine upside down. Using the supplied wrench, remove the bolt, washer, and pad.
- Add the sanding disc and center it on the maroon pad. Now reassemble in order. Be sure the bolt is tight. It’s OK if the disc warps slightly when tightened down.
- Place a dust bag or vacuum hose over the exhaust pipe.
- Connect the power cord, switch the machine to HI, but don’t turn it on just yet.
- Place the center of the disc over the line where the drum sander stopped.
- Face the edger toward the wall then turn it to the right slightly, to the “2 o’clock” position.
- Tilt the machine back before you switch it on. You don’t want the sandpaper to touch the floor.
- Turn it on and use the same feathering technique to transition from one area to the next.
As with a drum sander, you must keep the edger moving as you lower the sandpaper disc to the floor. It’s not necessary to press down on the machine. Its weight provides enough pressure for all types of sanding. Remember to empty the bag when it’s 1/3 full.
When you’ve finished or while taking a break, don’t rest the machine on the sanding disc assembly. It can cause the rubber pad to become warped and out of balance.
To make the job easier, sand the room in the same direction as the edger spins, clockwise. Remember to start from the area of the floor where the drum sander stopped then move toward the wall. This ensures a smooth, blended, sanding job.
Professional Edger Sanding Tips
- Sand 1 to 2-foot sections at a time
- Always keep it moving back and forth
- Sand in a Z-pattern, moving closer to the wall with each pass
Pro Tip: Mark the perimeter of the room with pencil marks. Sanding over them ensures that you have sanded the entire floor and overlapped each section.
At the end of the job or to check your progress, lay a flashlight on the floor. This will highlight any leftover swirls. Use 80 or 100-grit paper to hand-sand them if there are only a few.
To help you use the right techniques for both floor sanders, we recommend reviewing this excellent video on the use of these wood floor sanding machines.
A Quick Word about Sandpaper
Sandpaper grit with a small number is coarse, and a high number is a fine grit. Coarse sandpaper removes material faster and scratches deeper. Check out this handy grit chart here.
Don’t try to save money by using the sandpaper until it’s almost smooth and glazed. It’s going to make lots of dust and look like it’s working, but it isn’t removing the material. As you change to finer sandpaper, it won’t remove the scratches from the previous pass because there is nothing left on the paper.
The rule of thumb to replace the sanding belt or disc is to estimate by square footage. Most belts effectively sand about 250 sq. ft.
For edger discs, change them after about 20 sq. ft. Check with the flooring or rental store experts to be sure.
How to Choose the Best Hardwood Floor Sanding Machine

You want a drum sander that uses a continuous sleeve or belt. Avoid the types that use an adhesive to wrap the sandpaper around the drum. They are harder to replace and make chatter marks more easily.
For removing an old finish down to the wood, avoid renting a random orbital sander. They don’t have enough power or abrasiveness to do the job.
Choose a wood floor sanding machine that uses a lever to raise and lower the sanding drum. It helps to reduce gouging and chatter marks. The lever makes stopping and starting smoother.
When looking for an edger, be sure it comes with all the right pads and the wrench.
Which Wood Floor Sander Is the Best?
For you to determine the best floor sander depends on whether this is a one-time job, or you plan to use it for your business. Some of the standard features you want include:
- 1 ½ HP motor
- Easy to change the sanding belt
- Hand control for raising and lowering the drum
- Tight-fitting dust bag or integrates with a vacuum cleaner
- Collapsible for easy transportation
To help you evaluate the features of each model, here are four leading manufacturers of drum and edger sanders.
-
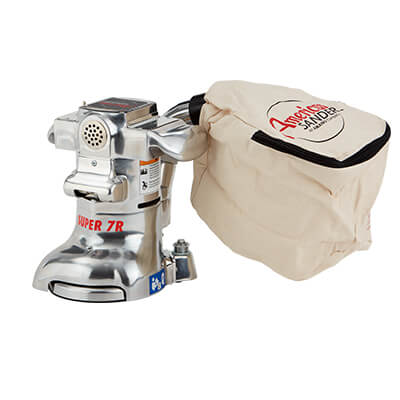
American Sanders – This Sparta, NC company makes three drum sanders and four edger models.

-
Bona – This 100-year-old company from Sweden makes a professional belt sander available in 8” or 10”. They have 4 edger models from which to choose.

-
Laegler – These German-made machines come in 4 drum models and specialty models for stairs, corners, and edges.

-
Galaxy – This Toronto-based company builds four models of drum sanders from 8” to 12” wide. They also have a 2-speed “Elite” edger.

If you are renting, the store will already have a quality machine. Ask for a demonstration and get instructions before using it on your floor for the first time.
By listening to the experts and watching the videos we linked to, you should get fabulous results from your sanding efforts.
However, if the floor is beyond sanding, consider an easy, DIY solid hardwood floor replacement. The Easiklip solution uses no screws, glue, or nails. It’s pre-finished, so you won’t need to sand it either.

As an Amazon Associate, Easiklip Floors earns from qualifying purchases. This helps us provide more great blog content. Thank you for your support.
- Easiklip Floors - Harry Chu