Floor Sander Rental Guide for DIYers
On This Page:
Which Type of Floor Sander to Rent
- Drum Floor Sander
- Edge Floor Sander
- Orbital Vibrating Floor Sander
- Vibrating Sander for Floors
- Which Sander Should You Use?
- Let’s Talk About Floor Sander Safety
- What Kind of Sandpaper Should I Buy?
Best Place to Rent A Floor Sander
How Much Does It Cost to Rent a Floor Sander?
What Kind of Floors Can I Sand?
How to Avoid Floor Sanding Mistakes
- Using the Wrong Grit Sandpaper
- Not Sanding Long Enough
- Sanding in the Wrong Direction
- Not Sanding the Edges Properly
- Not Changing the Sandpaper When You Should
Sometimes It’s Easier to Install A New Wood Floor
Although solid hardwood floors can last for centuries, the finish won’t. Floor finishes can fade, change color, or wear off completely, leaving a wooden floor that looks like something from an abandoned home.
So, you’ve finally decided that it’s time to do something about your scuffed and dingy hardwood floor. It had to happen sooner or later. You have to refinish the floor, and the first step is sanding it down to bare wood.
If you know nothing about sanding a floor, floor sander rental, or how to use one, you’re in good company. This article will help any DIYer take the mystery out of a floor sander rental.
Most people, including your friends and neighbors, don’t have a floor sander lying around. Your only options are to purchase or rent one. This equipment is expensive, and unless you plan to go into the flooring business, leasing is your only option.
In this floor sander rental guide, you’ll discover how much it costs to rent a floor sander, where to get one, and which type of machine you should choose. We want to help you get the right floor sander, save time and money.
Which Type of Floor Sander to Rent
There are three types of floor sanders, Drum, Orbital, and Edge. Here’s the low down on each one.
Drum Floor Sander

As the name implies, a drum sander uses a rotating cylinder or a large belt with sandpaper. It’s similar in size to a small lawnmower. Like a mower, you push and pull it using a handle. However, there is a definite technique to use a drum sander correctly, or you’ll ruin the floor. For tips on using it, go to our article, “How to Use a Wood Floor Sander Machine.”
The body of a drum sander consists of the motor, the drum, and a large dust bag. The drum has easy access so that you can attach belts of sandpaper in varying grits. We’ll cover grit sizes in a moment.
The drum sander is the big workhorse of any floor sanding job because it covers about 90 to 95% of the floor. Due to its bulk, it won’t sand up to the baseboard, doorways, or get around corners. For tight spaces, you need an edge sander.
To see what a floor looks like when the operator doesn’t use a good drum sanding technique, check out this video.
Pro Tip: If you can find a belt-type floor sander versus a drum, it will reduce the chances of leaving chatter marks.
Edge Floor Sander
An edge floor sander, or edger, is much smaller than a drum sander. Most edge floor sanders have two handles to control them. It uses a rotary plate from 5 to 7 inches wide, to which you affix the sanding discs. However, sometimes you can use a belt sander, but the rotary version does a smoother job with less mess. An edge floor sander has a removable dust bag, or you can attach a shop-vac hose to contain the dust.
When you use an edge sander, always keep the disc moving along the floor. Never stop in one place. Instead of moving side to side, it’s best to use a zig-zag pattern and finish with one long stroke before moving to the next section. This will help reduce wavey patterns that you won’t notice until after you apply the finish.
There are two reasons to rent an edge floor sander. First, they are more powerful than the typical hand-held orbital sander. Second, you need a sander specifically for all the places a drum sander misses.
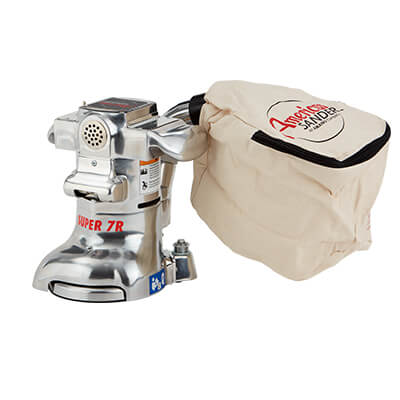
Orbital Vibrating Floor Sander

Like the drum sander, you operate an orbital vibrating floor sander while standing up. The difference between the two is the sanding head vibrates in tight circles rather than revolve in a drum. A random orbital floor sander may have one large disc or three smaller ones depending on the model.
You don’t have to sand in the same direction as the wood grain with an orbital machine. You can sand in any direction. Keep in mind, it’s not as aggressive as a drum sander, even using coarse 24-grit paper.
Vibrating Sander for Floors

Like orbital sanders, vibrating sanders are used primarily as a finishing sander to smooth out the wood after using the drum sander.
A vibrating sander uses vibrating pads rather than circular discs. The rectangular head is 12” x 18” and is about the same size as a drum sander but is lighter. It removes material at about the same rate as an orbital sander. They are less likely to damage the floor and a good choice to finish sanding after using the drum sander.
Which Sander Should You Use?
For old, deeply gouged floors, or where there is a heavy build-up of paint or polyurethane, you’ll want to use the drum sander. Vibrating or random orbital sanders work well to smooth out the floor after the drum sander. If your floor is new and unfinished or old, but in good shape, you can get by with just the orbital sander.
You’ll need an edge sander no matter what type of sander you rent for the rest of the floor.
At a minimum, you’ll need to rent two sanders;
- a drum, and
- an edge sander.
Let’s Talk About Floor Sander Safety
Floor sanders are commercial-grade tools and operate at a higher capacity. Here some safety tips when using one:
- Drum sanders use lots of power. Use only the extension cord rated for the higher watts and amps.
- Keep the cord loose. A tightly wound cord can melt due to excess heat.
- Always unplug the floor sander when not using it, changing the sandpaper, or working on the machine.
- The dust bags collect about 80 to 90% of the dust, leaving fine dust to escape. Always use a dust mask for personal protection and seal off doorways to keep dust from circulating in the home.
- Air-borne fine dust is combustible and can explode. Make sure there are no flames present (lighting cigarettes) and always ventilate the room.
Stay safe by respecting the power of the machine and the hazards of excess sanding dust.
What Kind of Sandpaper Should I Buy?
There are five grades of sandpaper, categorized by the size of the grit. Here is the list with the corresponding grit numbers:
- Very Coarse -12, 16,20 & 24
- Coarse – 24, 30, 36 & 40
- Medium – 50 & 60
- Fine – 80 & 100
- Extra Fine – 120 &150
The best place to buy sandpaper is the same place you rent your machine. They will stock the exact belts and discs that fit the machine. Buy plenty of extras for each grit. Usually, the rental store will repurchase the unused paper.
If you are sanding an old floor with lots of old finish, start with a very coarse grit like 24 or 30-grit. After each pass, you’ll work across the room using ever finer sandpaper. It can take 4 to 5 passes with various grits to make the floor super smooth and ready to finish.
Best Place to Rent A Floor Sander
So that you know, you won’t find a floor sander rental at Lowes. They don’t rent (as of 2021). You can opt for a floor sander rental at home depot, and there are plenty of places to rent floor sanders and purchase accessories. It’s a good idea to look for a floor sander with vacuum rental.
Click the link to visit their online stores. To find a drum floor sander rental near me, here is a list in alphabetical order:
- American Rentals
- Herc Rentals
- Home Depot
- Reddy Rents
- Star Rentals
- Sunbelt Rentals
- Menards (Midwest only)
- True Value
- United Rentals
- U-Sand
If you plan to take two or three days to complete the job, be sure to get a daily rate, not an hourly rate. Also, just because the website lists the sander you want to rent, call the store first. They may not have it at your location. You can do a quick search for a “drum floor sander rental near me.”
How Much Does It Cost to Rent a Floor Sander?
Floor sander rental costs vary depending upon location, but you should be able to rent a drum sander for about $50 to $80 per day. Orbital sanders and edge sanders will rent slightly less. Rent for a more extended period, like a week, to save money.
The rental won’t be your most significant expense unless you already have lots of DIY tools. The real cost is in the sandpaper and accessories.
Other Tools or Accessories You Need When Sanding a Floor
Besides the sanders, you’ll need some tools and accessories to complete a floor sanding job.
|
Material or Tools |
Cost |
Edger Floor Sander |
$37 to $60 per day |
Sandpaper |
$0.25 each for 5 inch discs / Drum sleeves - $4-$5 |
12/3, 15-amp extension cord |
$70 |
$8 |
|
Respirator |
$30 |
Shop vacuum |
$70 - $170 |
$10 per pair |
|
Heavy duty trash bags |
$25 |
Pro tip – The cost of renting a sander is nothing compared to what it will cost to replace the floor because you don’t know how to use it. Floor sanding is a critical skill best left to experienced professionals. The final finish coats will magnify any chatter marks and other damage from improper sanding.
What Kind of Floors Can I Sand?
Before you rent a sander and start sanding away, you need to know what kind of hardwood floor you have. It’s OK to sand and refinish solid hardwood floors multiple times over their useful life. You can check the floor in an inconspicuous place like inside the closet if you’re not sure. Pry up a small board to see if it is solid hardwood or something else.

Older homes tend to have solid tongue and groove wood floors. The wood should be 1/2in. to 3/4in. thick.
Newer homes or remodelled homes may have engineered hardwood. You may sand and refinish higher-quality engineered hardwoods once before needing replacement. It depends on the thickness of the top layer of the wood veneer.
Laminate flooring or vinyl plank flooring is not wood. It is a photographic copy of wood, so you can’t sand or refinish them.
Pro Tip – Most likely, you’ll have solid hardwood if a home is older than the 1970s. If it is an 80s house or newer, it could be any type of flooring, so you need to take a sample. Repeating wood grain patterns means the floor is a vinyl laminate, and you can’t sand it.
How to Avoid Floor Sanding Mistakes
There is a learning curve when learning anything new. Sanding a hardwood floor is no exception. The mistakes we’re listing here came from DIYers who learned the wrong and expensive way. Hopefully, you’ll avoid making the same mistakes after reading these.
-
Using the Wrong Grit Sandpaper
If your floors are in bad shape, start the coarsest paper, usually 24 grit. If you sand with grit, that’s too fine, it will take much longer, and you’ll spend a lot of money on sandpaper.
-
Not Sanding Long Enough
Sanding your floors is hard work! Whether the boards are a bit cupped or warped, you can’t stop until the floor is flat and all the old finish is gone.
-
Sanding in the Wrong Direction
With a drum sander, you want to sand in the direction of the wood grain. You can work diagonally to smooth out the boards. Just be sure to finish in the direction of the grain.
-
Not Sanding the Edges Properly
Sanding along the edges of the room is a chore and can be tough on your back. One shortcut is to sand the edges slightly less than the main floor, and you can stop after using 80 grit. The edge will be smooth enough and will save you some time.
-
Not Changing the Sandpaper When You Should
Don’t get cheap, and try to get every last inch out of a sanding disc or sleeve. It will do a poor job and take you longer than changing the paper when it isn’t completely clogged.
Sometimes It’s Easier to Install A New Wood Floor
After doing all the research and understanding what’s involved with sanding and finishing a hardwood floor, you may change your mind about refinishing. Given that installing a solid hardwood floor by Easiklip is easier and takes less time, why not go for a new floor? Easiklip uses aluminum clips, not screws, nails, or glue. See for yourself by watching the installation video here.

As an Amazon Associate, Easiklip Floors earns from qualifying purchases. This helps us provide more great blog content. Thank you for your support.
- Easiklip Floors - Harry Chu